

How To Animate Imageviews Across The Screen In Android Studio
Android - Animations
Animation is the process of creating motion and shape change
Blitheness in android is possible from many ways. In this affiliate nosotros will discuss i easy and widely used way of making animation called tweened animation.
Tween Animation
Tween Animation takes some parameters such as outset value , end value, size , fourth dimension duration , rotation angle e.t.c and perform the required blitheness on that object. Information technology can exist practical to any type of object. So in society to apply this , android has provided united states of america a class called Blitheness.
In club to perform animation in android , we are going to call a static function loadAnimation() of the form AnimationUtils. Nosotros are going to receive the result in an example of Animation Object. Its syntax is as follows −
Animation animation = AnimationUtils.loadAnimation(getApplicationContext(), R.anim.myanimation);
Note the second parameter. It is the name of the our animation xml file. Y'all have to create a new binder chosen anim under res directory and make an xml file under anim folder.
This animation class has many useful functions which are listed beneath −
| Sr.No | Method & Description |
|---|---|
| 1 | first() This method starts the animation. |
| ii | setDuration(long elapsing) This method sets the duration of an blitheness. |
| three | getDuration() This method gets the duration which is fix by above method |
| 4 | terminate() This method ends the animation. |
| v | cancel() This method cancels the animation. |
In gild to apply this animation to an object , we volition just call the startAnimation() method of the object. Its syntax is −
ImageView image1 = (ImageView)findViewById(R.id.imageView1); image.startAnimation(blitheness);
Example
The following example demonstrates the use of Animation in android. Yous would exist able to cull different type of animation from the menu and the selected animation will be applied on an imageView on the screen.
To experiment with this instance , you need to run this on an emulator or an actual device.
| Steps | Description |
|---|---|
| 1 | You volition use Android studio IDE to create an Android awarding and name it as My Application under a packet com.case.sairamkrishna.myapplication. |
| ii | Alter src/MainActivity.java file to add animation code |
| 3 | Modify layout XML file res/layout/activity_main.xml add whatever GUI component if required. |
| 4 | Create a new folder under res directory and telephone call it anim. Confim information technology by visiting res/anim |
| 5 | Right click on anim and click on new and select Android XML file You take to create different files that are listed beneath. |
| six | Create files myanimation.xml,clockwise.xml,fade.xml,motility.xml,blink.xml,slide.xml and add the XML code. |
| 7 | No need to change default string constants. Android studio takes care of default constants at values/string.xml. |
| 8 | Run the awarding and choose a running android device and install the application on it and verify the results. |
Here is the modified code of MainActivity.java.
package com.example.sairamkrishna.myapplication; import android.app.Activity; import android.bone.Package; import android.view.View; import android.view.animation.Blitheness; import android.view.blitheness.AnimationUtils; import android.widget.ImageView; import android.widget.Toast; public class MainActivity extends Activity { @Override protected void onCreate(Bundle savedInstanceState) { super.onCreate(savedInstanceState); setContentView(R.layout.activity_main); } public void clockwise(View view){ ImageView prototype = (ImageView)findViewById(R.id.imageView); Animation animation = AnimationUtils.loadAnimation(getApplicationContext(), R.anim.myanimation); image.startAnimation(animation); } public void zoom(View view){ ImageView image = (ImageView)findViewById(R.id.imageView); Blitheness animation1 = AnimationUtils.loadAnimation(getApplicationContext(), R.anim.clockwise); prototype.startAnimation(animation1); } public void fade(View view){ ImageView image = (ImageView)findViewById(R.id.imageView); Animation animation1 = AnimationUtils.loadAnimation(getApplicationContext(), R.anim.fade); image.startAnimation(animation1); } public void blink(View view){ ImageView paradigm = (ImageView)findViewById(R.id.imageView); Animation animation1 = AnimationUtils.loadAnimation(getApplicationContext(), R.anim.glimmer); prototype.startAnimation(animation1); } public void move(View view){ ImageView image = (ImageView)findViewById(R.id.imageView); Animation animation1 = AnimationUtils.loadAnimation(getApplicationContext(), R.anim.move); image.startAnimation(animation1); } public void slide(View view){ ImageView paradigm = (ImageView)findViewById(R.id.imageView); Animation animation1 = AnimationUtils.loadAnimation(getApplicationContext(), R.anim.slide); prototype.startAnimation(animation1); } } Here is the modified lawmaking of res/layout/activity_main.xml.
Here abc indicates about logo of tutorialspoint
<RelativeLayout xmlns:android="http://schemas.android.com/apk/res/android" xmlns:tools="http://schemas.android.com/tools" android:layout_width="match_parent" android:layout_height="match_parent" android:paddingLeft="@dimen/activity_horizontal_margin" android:paddingRight="@dimen/activity_horizontal_margin" android:paddingTop="@dimen/activity_vertical_margin" android:paddingBottom="@dimen/activity_vertical_margin" tools:context=".MainActivity"> <TextView android:layout_width="wrap_content" android:layout_height="wrap_content" android:text="Alert Dialog" android:id="@+id/textView" android:textSize="35dp" android:layout_alignParentTop="true" android:layout_centerHorizontal="true" /> <TextView android:layout_width="wrap_content" android:layout_height="wrap_content" android:text="Tutorialspoint" android:id="@+id/textView2" android:textColor="#ff3eff0f" android:textSize="35dp" android:layout_below="@+id/textView" android:layout_centerHorizontal="true" /> <ImageView android:layout_width="wrap_content" android:layout_height="wrap_content" android:id="@+id/imageView" android:src="@drawable/abc" android:layout_below="@+id/textView2" android:layout_alignRight="@+id/textView2" android:layout_alignEnd="@+id/textView2" android:layout_alignLeft="@+id/textView" android:layout_alignStart="@+id/textView"/> <Button android:layout_width="wrap_content" android:layout_height="wrap_content" android:text="zoom" android:id="@+id/button" android:layout_below="@+id/imageView" android:layout_alignParentLeft="true" android:layout_alignParentStart="true" android:layout_marginTop="40dp" android:onClick="clockwise"/> <Button android:layout_width="wrap_content" android:layout_height="wrap_content" android:text="clockwise" android:id="@+id/button2" android:layout_alignTop="@+id/button" android:layout_centerHorizontal="true" android:onClick="zoom"/> <Button android:layout_width="wrap_content" android:layout_height="wrap_content" android:text="fade" android:id="@+id/button3" android:layout_alignTop="@+id/button2" android:layout_alignParentRight="truthful" android:layout_alignParentEnd="truthful" android:onClick="fade"/> <Button android:layout_width="wrap_content" android:layout_height="wrap_content" android:text="glimmer" android:onClick="blink" android:id="@+id/button4" android:layout_below="@+id/button" android:layout_alignParentLeft="true" android:layout_alignParentStart="truthful" /> <Button android:layout_width="wrap_content" android:layout_height="wrap_content" android:text="move" android:onClick="motility" android:id="@+id/button5" android:layout_below="@+id/button2" android:layout_alignRight="@+id/button2" android:layout_alignEnd="@+id/button2" android:layout_alignLeft="@+id/button2" android:layout_alignStart="@+id/button2" /> <Button android:layout_width="wrap_content" android:layout_height="wrap_content" android:text="slide" android:onClick="slide" android:id="@+id/button6" android:layout_below="@+id/button3" android:layout_toRightOf="@+id/textView" android:layout_toEndOf="@+id/textView" /> </RelativeLayout>
Here is the lawmaking of res/anim/myanimation.xml.
<?xml version="1.0" encoding="utf-eight"?> <set xmlns:android="http://schemas.android.com/apk/res/android"> <calibration xmlns:android="http://schemas.android.com/apk/res/android" android:fromXScale="0.v" android:toXScale="3.0" android:fromYScale="0.v" android:toYScale="3.0" android:elapsing="5000" android:pivotX="50%" android:pivotY="50%" > </calibration> <calibration xmlns:android="http://schemas.android.com/apk/res/android" android:startOffset="5000" android:fromXScale="iii.0" android:toXScale="0.5" android:fromYScale="3.0" android:toYScale="0.5" android:duration="5000" android:pivotX="50%" android:pivotY="l%" > </scale> </ready>
Here is the lawmaking of res/anim/clockwise.xml.
<?xml version="1.0" encoding="utf-8"?> <set xmlns:android="http://schemas.android.com/apk/res/android"> <rotate xmlns:android="http://schemas.android.com/apk/res/android" android:fromDegrees="0" android:toDegrees="360" android:pivotX="50%" android:pivotY="50%" android:duration="5000" > </rotate> <rotate xmlns:android="http://schemas.android.com/apk/res/android" android:startOffset="5000" android:fromDegrees="360" android:toDegrees="0" android:pivotX="50%" android:pivotY="fifty%" android:duration="5000" > </rotate> </set>
Here is the code of res/anim/fade.xml.
<?xml version="1.0" encoding="utf-viii"?> <fix xmlns:android="http://schemas.android.com/apk/res/android" android:interpolator="@android:anim/accelerate_interpolator" > <blastoff android:fromAlpha="0" android:toAlpha="i" android:duration="2000" > </alpha> <alpha android:startOffset="2000" android:fromAlpha="1" android:toAlpha="0" android:duration="2000" > </alpha> </set>
Here is the code of res/anim/blink.xml.
<?xml version="ane.0" encoding="utf-eight"?> <prepare xmlns:android="http://schemas.android.com/apk/res/android"> <alpha android:fromAlpha="0.0" android:toAlpha="1.0" android:interpolator="@android:anim/accelerate_interpolator" android:duration="600" android:repeatMode="reverse" android:repeatCount="infinite"/> </gear up>
Here is the code of res/anim/movement.xml.
<?xml version="i.0" encoding="utf-eight"?> <set up xmlns:android="http://schemas.android.com/apk/res/android" android:interpolator="@android:anim/linear_interpolator" android:fillAfter="true"> <translate android:fromXDelta="0%p" android:toXDelta="75%p" android:duration="800" /> </ready>
Here is the lawmaking of res/anim/slide.xml
<?xml version="1.0" encoding="utf-eight"?> <set xmlns:android="http://schemas.android.com/apk/res/android" android:fillAfter="true" > <scale android:duration="500" android:fromXScale="ane.0" android:fromYScale="1.0" android:interpolator="@android:anim/linear_interpolator" android:toXScale="1.0" android:toYScale="0.0" /> </fix>
Here is the modified lawmaking of res/values/string.xml.
<resources> <string name="app_name">My Application</string> </resource>
Hither is the default lawmaking of AndroidManifest.xml.
<?xml version="1.0" encoding="utf-8"?> <manifest xmlns:android="http://schemas.android.com/apk/res/android" packet="com.case.sairamkrishna.myapplication" > <application android:allowBackup="truthful" android:icon="@drawable/ic_launcher" android:label="@string/app_name" android:theme="@style/AppTheme" > <activity android:name="com.example.animation.MainActivity" android:characterization="@cord/app_name" > <intent-filter> <activity android:name="android.intent.action.MAIN" /> <category android:name="android.intent.category.LAUNCHER" /> </intent-filter> </action> </application> </manifest>
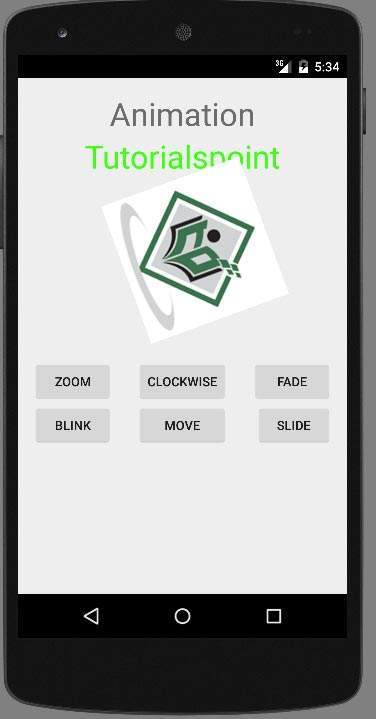
Let's endeavour to run your application. I assume you have connected your actual Android Mobile device with your calculator. To run the app from Android studio, open one of your project's activeness files and click Run  icon from the toolbar. Android studio volition display post-obit images
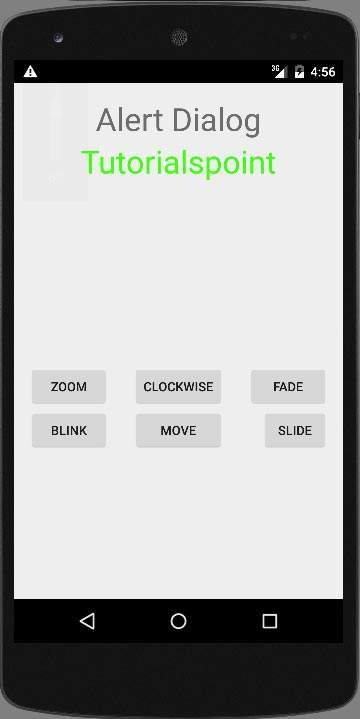
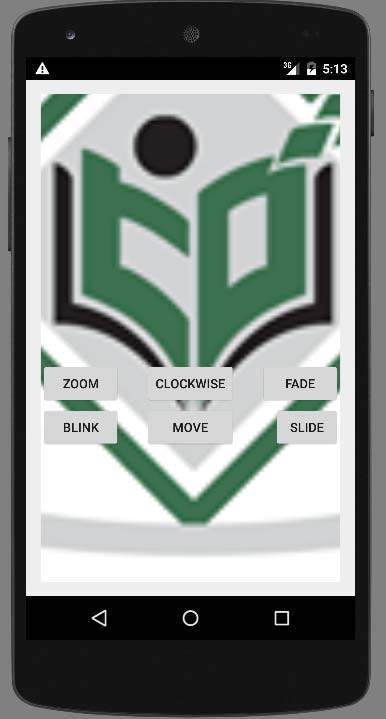
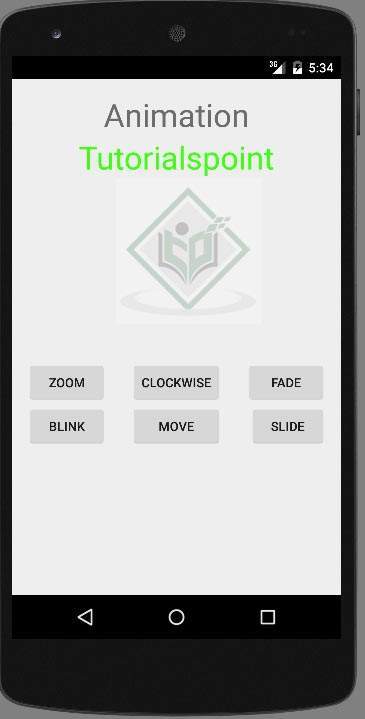
Select zoom button, it volition display post-obit screen −
Now select slide push, it will brandish following screen
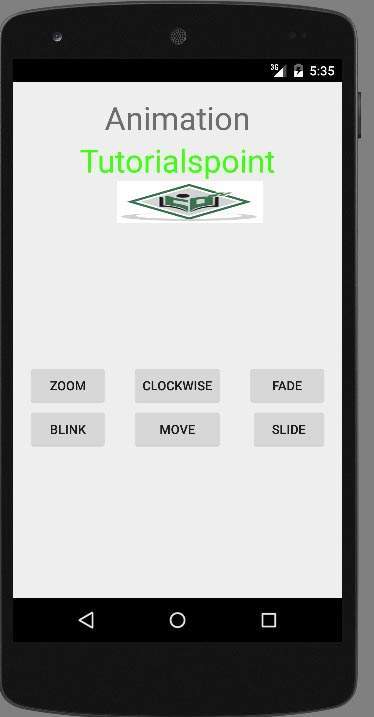
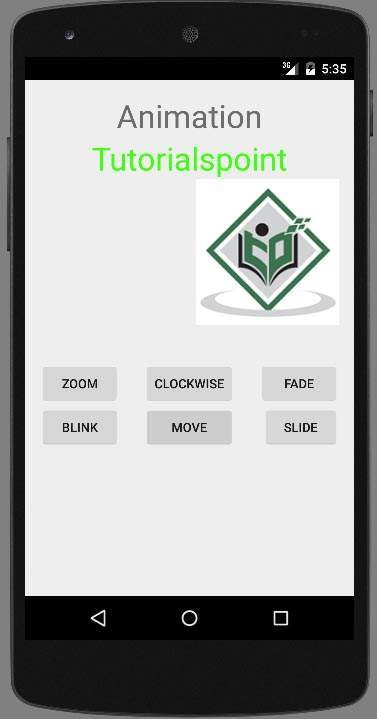
Now select move button, it will display following screen
At present the clockwise push button, information technology volition display post-obit screen
Now Fade button, it will brandish following screen
Note − If you run information technology in emulator , you lot may not experience smoothen animation event. You have to run information technology in your android mobile in order to feel the smooth animation.
Useful Video Courses

Video

Video

Video

Video

Video

Video
Source: https://www.tutorialspoint.com/android/android_animations.htm
Posted by: bryantderstly.blogspot.com
0 Response to "How To Animate Imageviews Across The Screen In Android Studio"
Post a Comment